|
[?]Subscribe To This Site
|
Concrete Slab Leveling Process
Knowing the concrete slab leveling process is an important step to pour a concrete slab during preparation for concrete slab construction. By following slab leveling process not only will help to maintain the concrete slab thickness during the pour but will help with concrete slab prices by minimizing the waste factor during backfilling and compaction. A slab that is not level can be extremely expensive to repair in order for the floor finishes to work.Such problems include doors not close, floor drains not work, standard studs need extended or cut to accommodate the floor unevenness, ceiling height not met, floor cabinets too high or low, floor tiles & carpet adjustments, etc. All these potential adjustments and associated additional cost and delay can be eliminated by making sure the slab is level at the beginning of the pour.
Knowing the necessary steps to ensure slab levelness is especially important if you are one of those diy concrete slab enthusiasts. Of course you can’t expect your slab to be perfectly level, but it needs to be kept to within acceptable tolerance of 1/4" in 10 ft. I have seen 1/2" that worked ok without major adjustments but keeping it to minimum will work best for everyone.
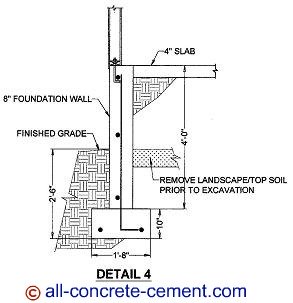
As per detail 4, the slab is leveled with the 4 feet high foundation walls this means there is no extra preparation at the perimeter. 
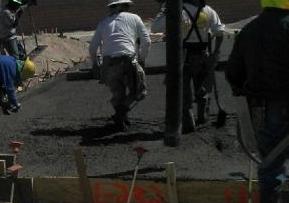
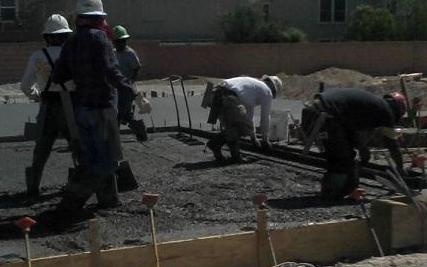
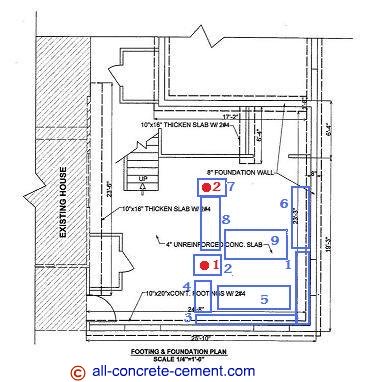
At the middle of the floor we need two points that can be used for leveling. First pull a string line from the top of foundation walls. With a slash hammer, drive a steel stake into the compacted fill at about halfway point, insert a nail into one of the holes and tab the stake down until the nail levels with the sting line. The locations of the steel stakes are marked with red dots on the plan. Repeat the process at every 10 feet or so, in this example we only need two locations. Slab Pour Steps: Step 1: Pour 2 feet wide strip 10 feet long along the foundation wall, see plan item #1 in blue Step 2: At the steel stake with the nail mentioned above pour a spot about 2 feet diameter making sure the concrete levels with the nail installed, see blue item #2 on plans. Step 3: Pour 2 feet wide strip along the foundation wall perpendicular to the strip poured in step 1, see plans item#3 in blue. Step 4: Close the gap between steps 2 & 3 by pouring 2 feet wide strip, see item#4 in blue on plans. To level this portion, use a 2x4 that is straight about 10 feet long.With the ends of the board touching the level points in steps 2 & 3, move the excess concrete out of the way by simultaneously pulling the board’s ends towards you. During the motion of pulling the board, make sure both ends of the board remain level to the top of the level points. Ideally concrete slab leveling needs 3 people, one at each end of the board, and one at the middle with a rake to add or remove concrete where needed. Using the rake or shovel, spread the concrete such that it is slightly higher than the bottom edge of the 2x4. Step 5: Close the gap between steps 1 & 4, see item 5 in blue on plans. Using the level points in steps 1 and 4 spread the concrete in between and repeat the procedures in step 4 as you level the concrete moving towards step 2. Step 6: Items 6, 7, 8, 9, in blue are repeats of steps 1 thru 5. Back to concrete slab leveling |
|


 The procedures for concrete slab leveling are listed in this page. Using the footing and foundation plan shown above will demonstrate how the process works.